

MIKAIA University Application Note: Interactively training an AI with the AI Authoring App — programming-free and from just a few example annotations
By design, researchers often have unique questions that they want to answer as quickly and efficiently as possible. The MIKAIA team will never be able to create dedicated AI Apps for all these unique research questions. Instead, we have developed the AI Author App that empowers users to create an AI themselves on their own data. Since the app is based on “Few Shot Learning”, meaning the underlying backbone-AI that was already pre-trained on millions of histology image patches can be adapted to new use cases based on only very few examples (and in fact is not actually changed), the “training” process is very fast. Simply by defining a set of distinct tissue classes and outlining prototypical areas for each class, a new AI can be trained within minutes.
| Input | |
| Staining | The features produced by the pre-trained backbone work optimally on HE-stains. While we observed also good performance on other stains, such as IHC, the app cannot currently be used with multiplexed immunofluorescence (mIF) slides. |
| Microscopy mode | Brightfield |
| Magnification | Typically 20x or 40x. |
| Supported Analysis Modes | ROI, FoV, Slide, Batch |
| Outputs | |
| Graphical Outputs | – Polygons (with holes) that outline tissue classes – When pre-clustering is disabled, tissue outlines are rectangular – Optionally, a rejection class (“unsure”) can be activated. When activated and depending on the sensitivity (1-100) areas that look unlike any of the training annotations will be assigned to the rejection class. |
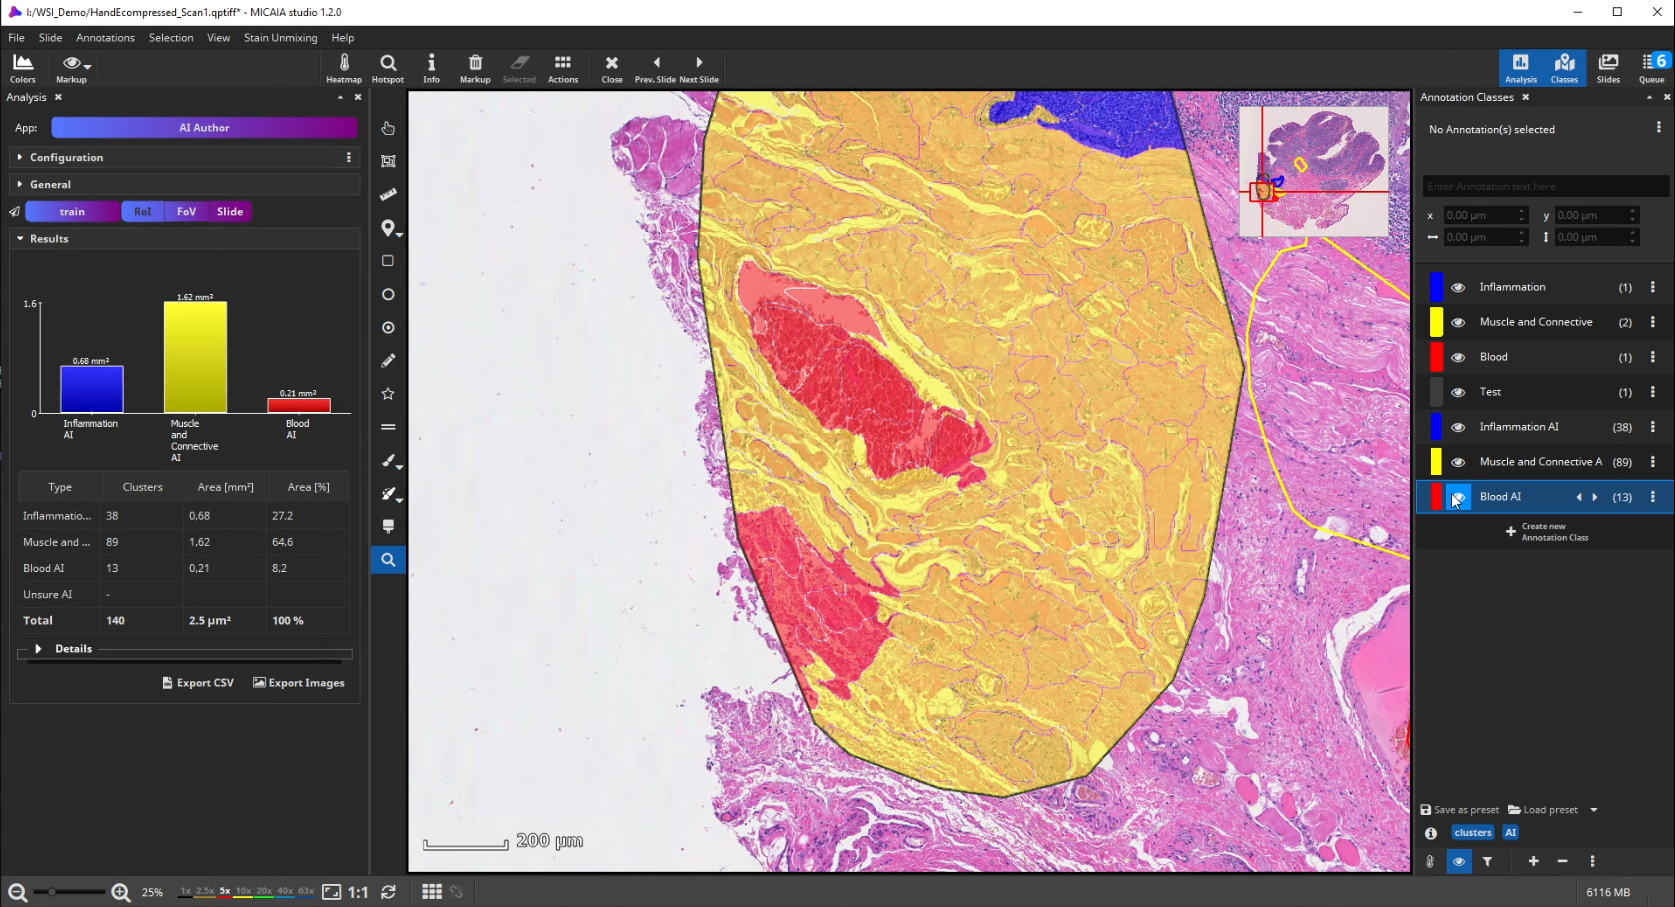
| Slide-level output metrics | – mm² and % per tissue class – T-SNE/UMAP/PCA plot of patches (helps locating outliers) – Tissue area in mm² |
| Description | |
| Pre-processing | Tissue detection [Optionally] pre-clustering of similarly looking regions. AI analysis is then used to classify each cluster. The average cluster side length (µm) is configurable. |
| Post- processing / additional options | Adjacent clusters/patches of identical tissue type can be fused |
| Technology / Algorithm | The App conducts a patch-wise classification, i.e., each patch (~50 x 50 µm) is assigned to a tissue class. An optional pre-clustering step ensures that predicted tissue areas align smoothly with the image contents (no checkerboard). This approach entails that an entire slide can be analyzed fast, typically within less than 5 minutes (depending on GPU), but it also means it is not well suited to segment fine structures such as vessels or cells that are smaller than a single patch. The app is AI-based and utilizes “Few Shot Learning”, more precisely ProtoNets. The ProtoNet backbone-AI has already been pre-trained on millions of H&E histology patches. The training was conducted in a special way, improving generalizability to other use-cases. |
| Speed | Seconds per field-of view. Typically < 5 minutes per whole-slide (depending on the GPU). When no CUDA-enabled GPU is available, the AI will run on the CPU, which is slower. |
| Use cases | Detect and measure areas of interest, such as tumors or metastases Create regions of interest (e.g., tumor) for downstream analysis (e.g., Cell detection within tumor).… |
DIY — do it yourself! Train your own classifier on your data in four simple steps.
- Define names of tissue classes you want to distinguish
- Annotate some typical regions for these classes in one or multiple slides. Since the AI has been pre-trained on histology images, this step does not require too many annotations. Then adapt the pre-trained AI on your use case by analyzing the annotated regions.
- Now apply your own classifier on new unseen regions or slides. If you are not happy with the accuracy yet, go back to step 2 and annotate falsely classified regions. Iteratively, the app will guide you where to annotate.
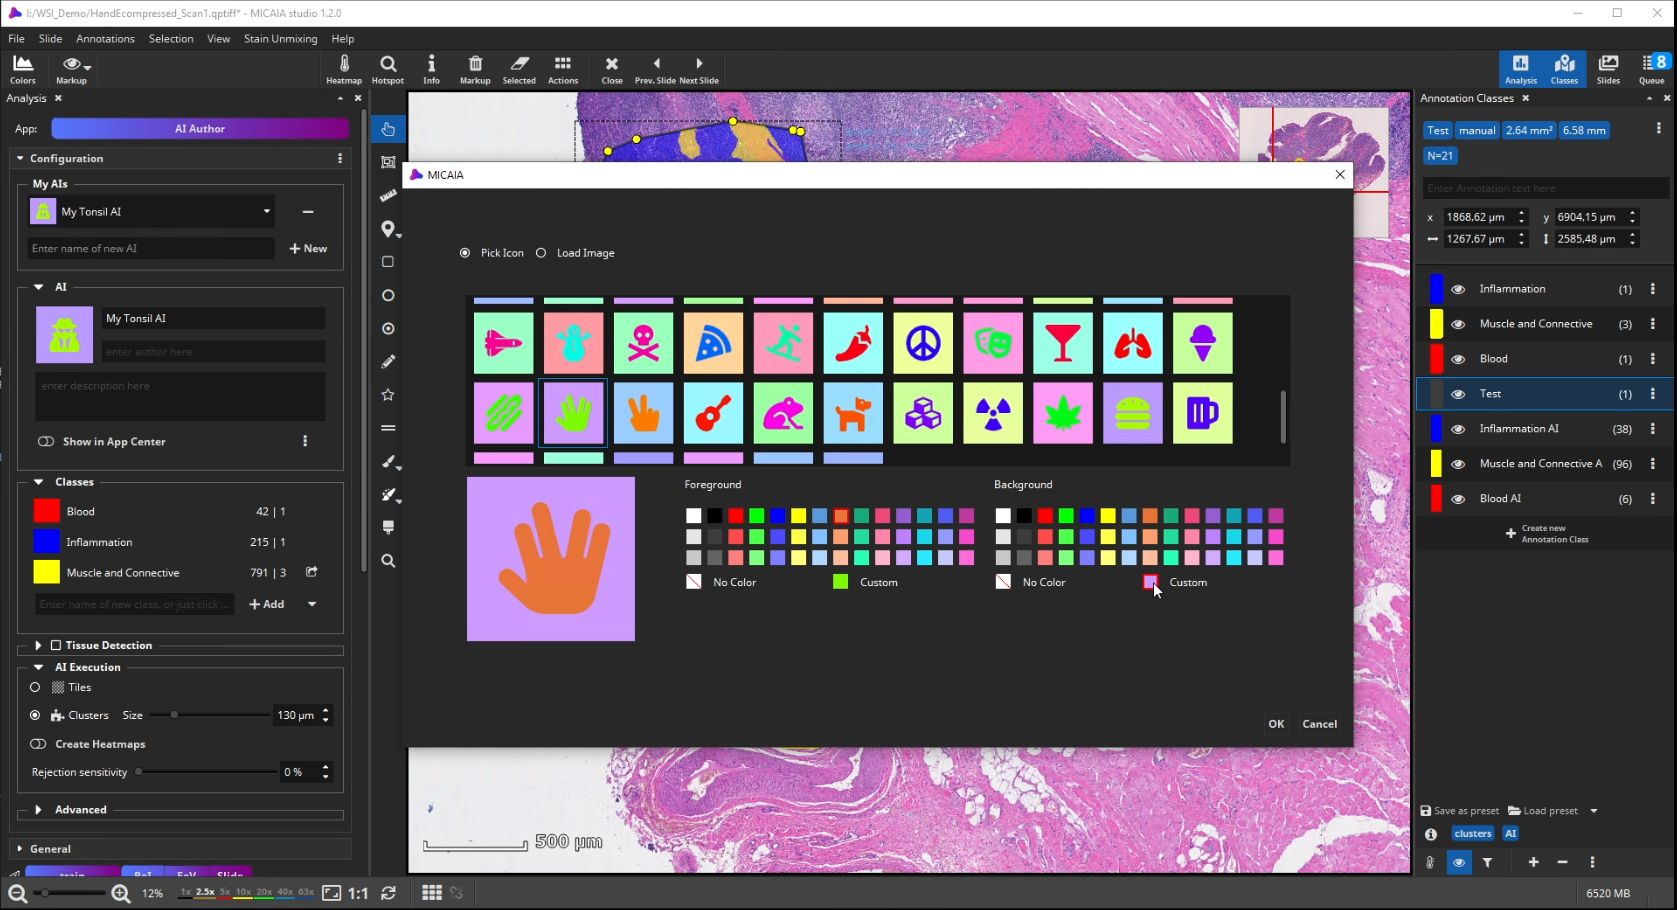
- Enter a description text, pick an image or icon, and add the trained AI as a new app to the app center. It can now be used by you or your colleagues. You can even share it with other MIKAIA users.
Video
Step by Step Usage
In this application note, we demonstrate how the AI Author App can be employed in a common use case.
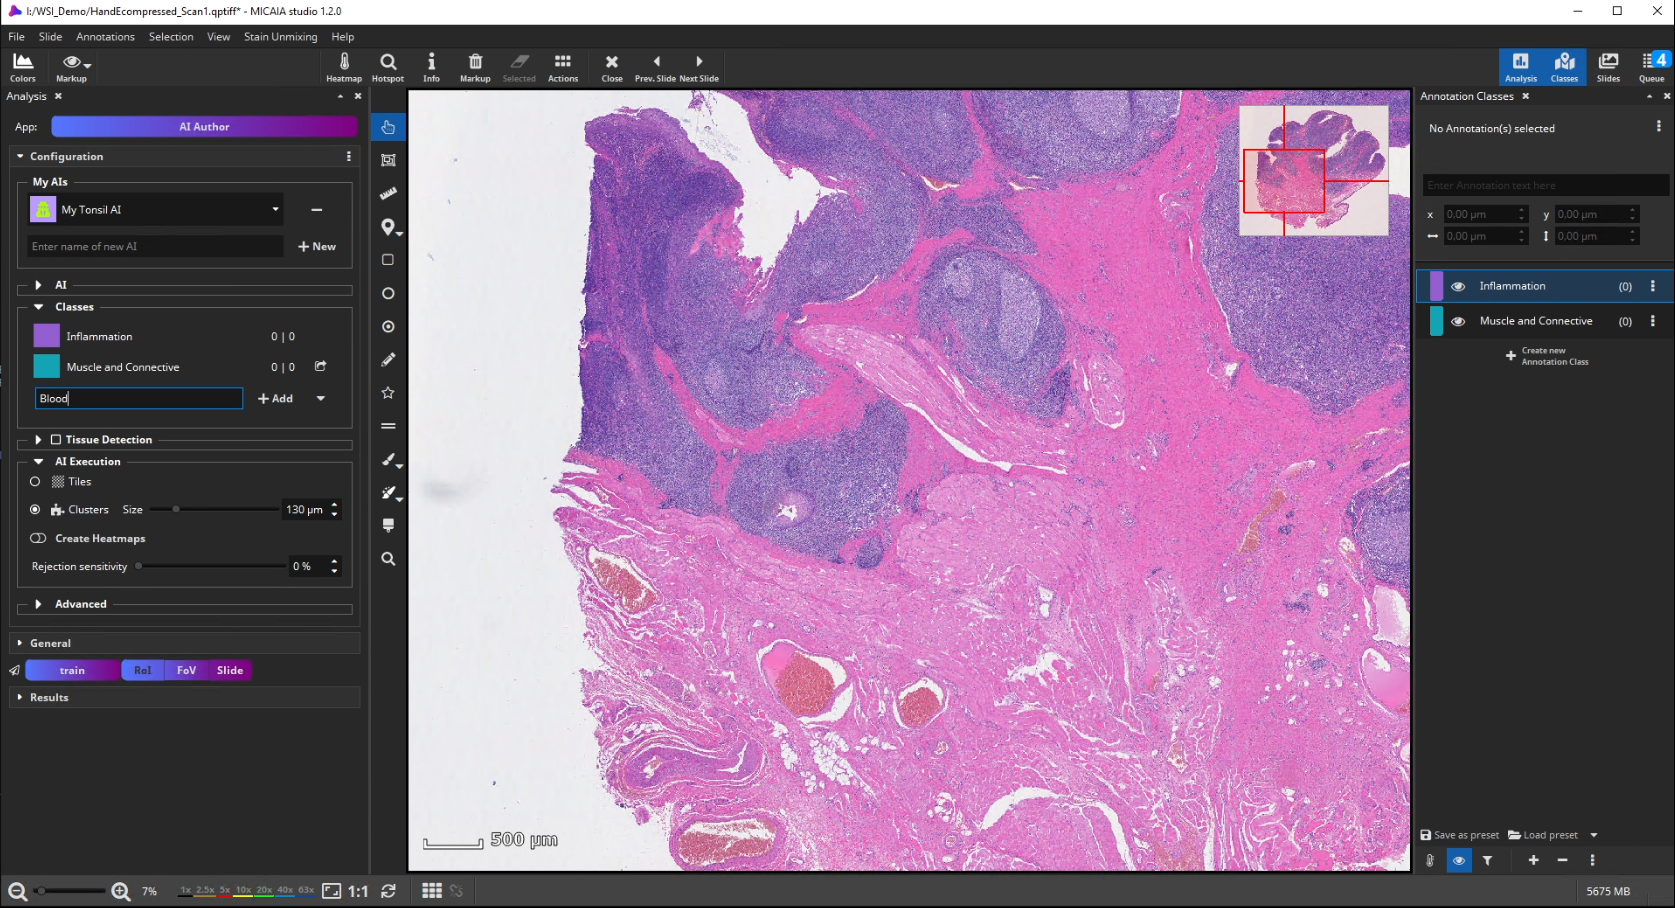
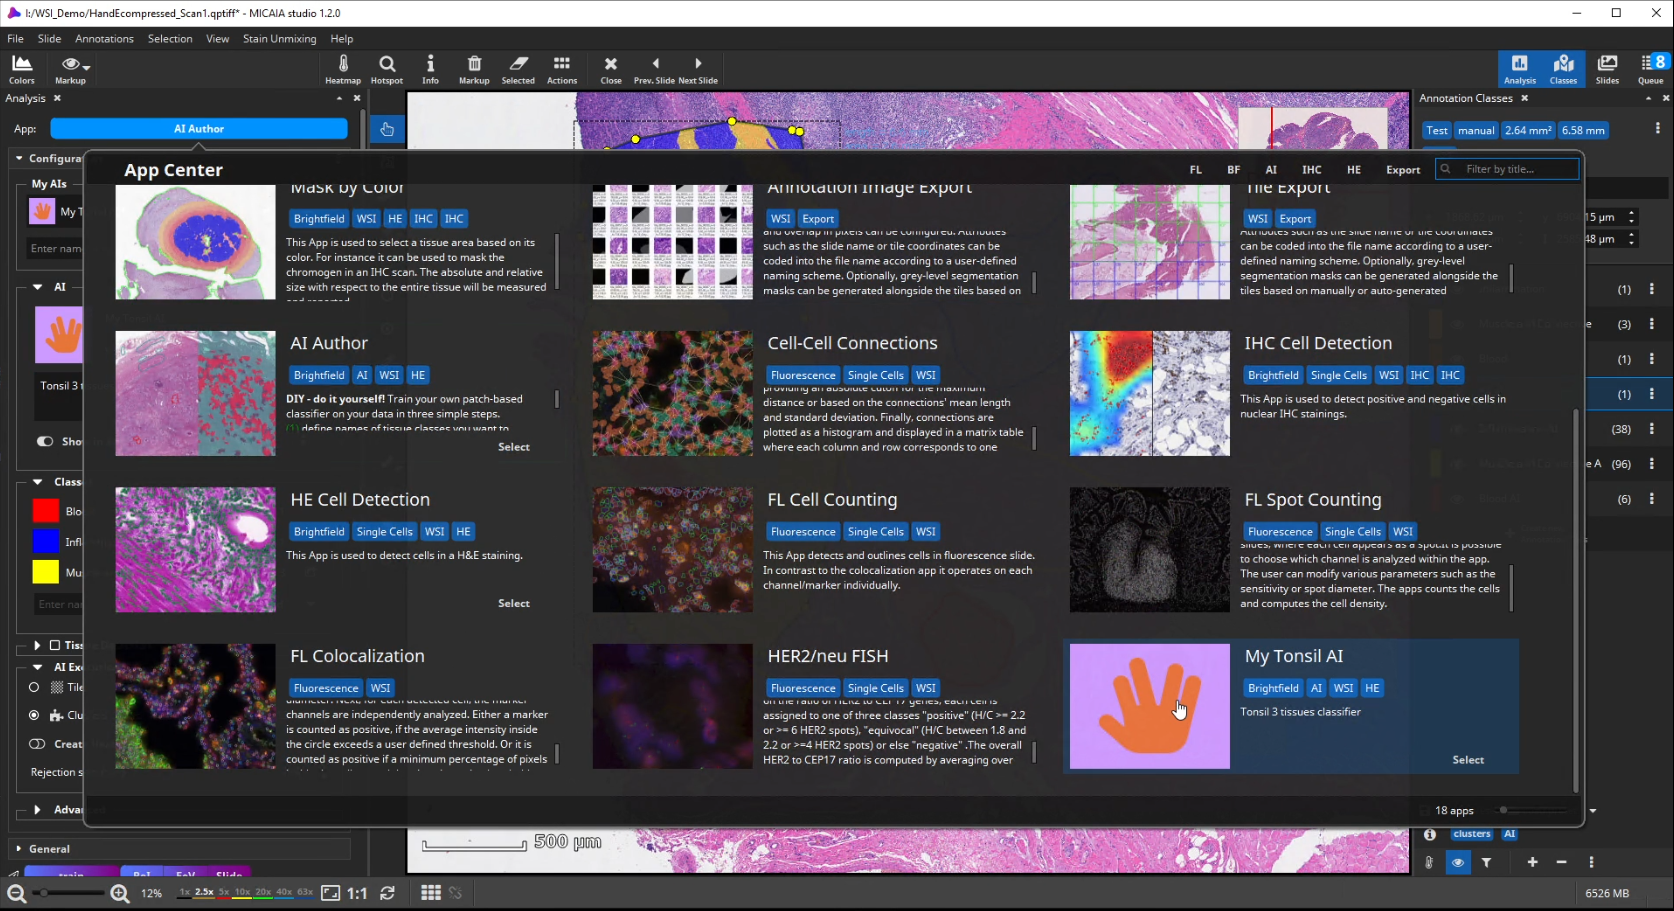
Configuration
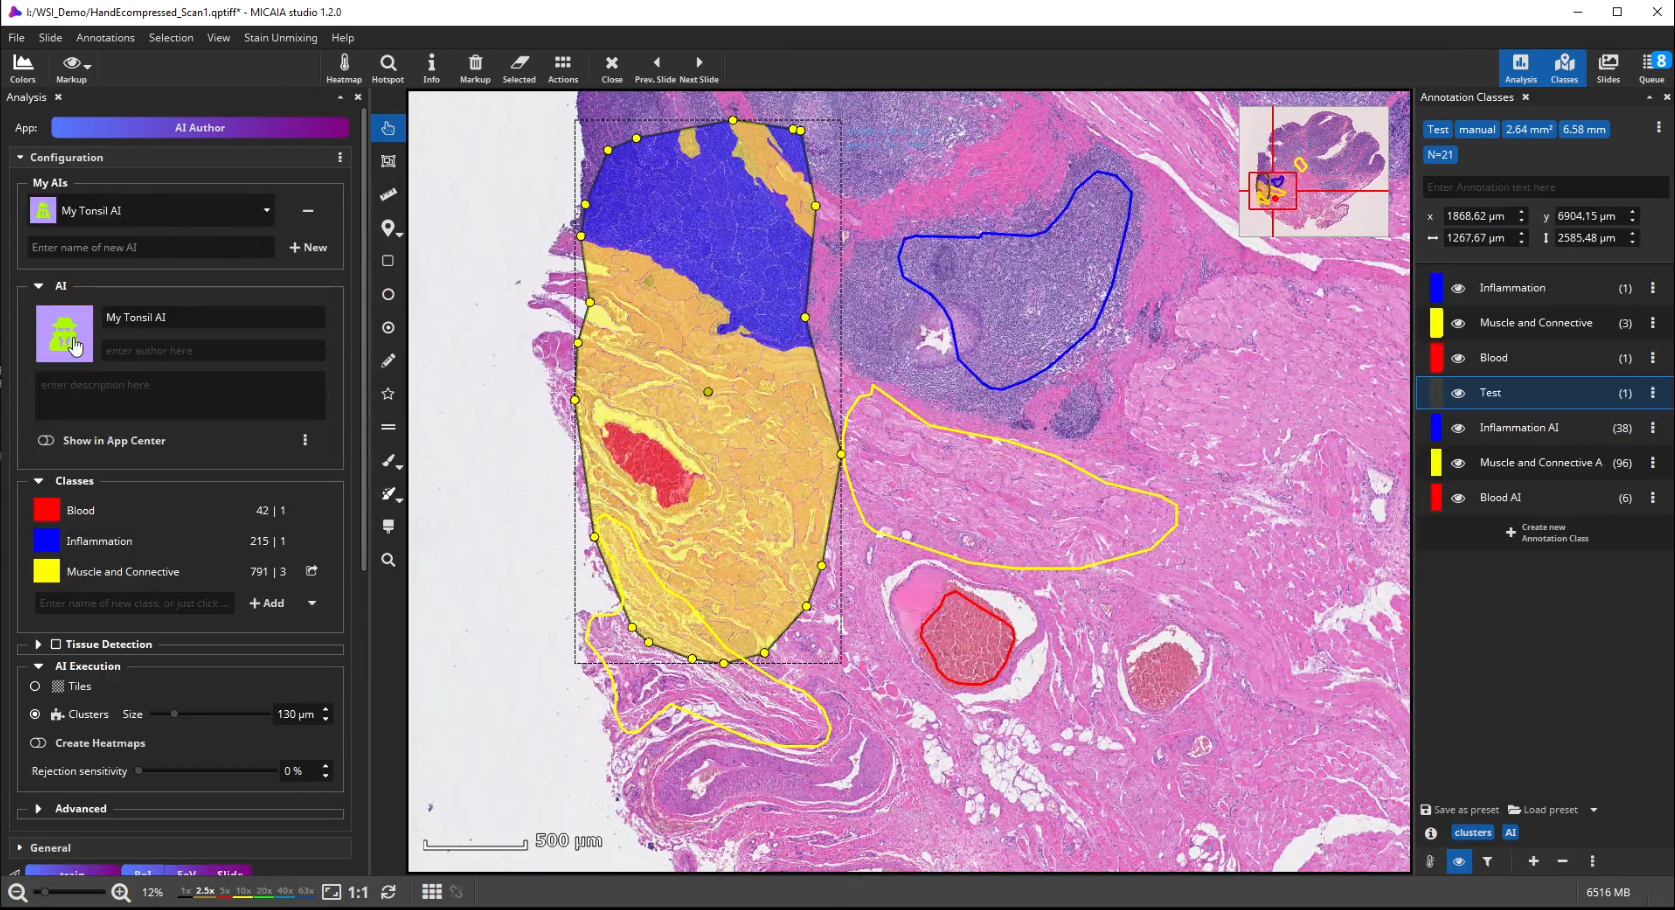
The workflow starts by selecting the AI Author App in the app center and creating a new AI. Then define a number of tissue classes according to your needs, e.g., three different classes that distinguish blood (red), inflammation (blue), and muscle and connective tissue (yellow), respectively.
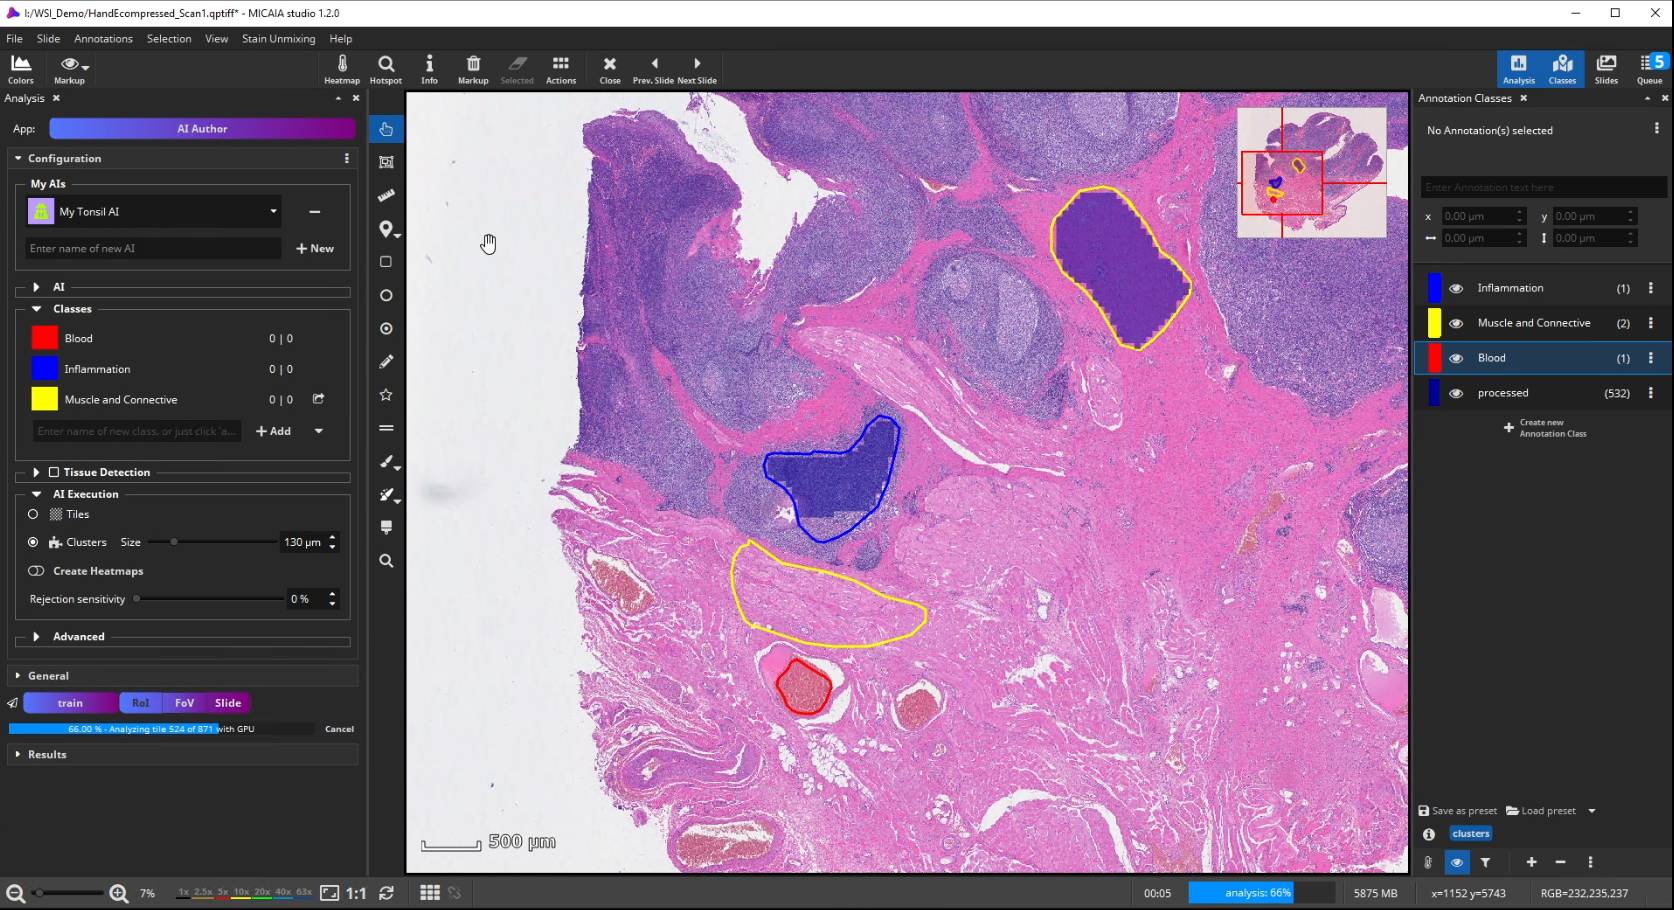
AI Training
Further on, the new AI is trained by creating some training annotations. Therefore, outline some stereotypical regions for each class. These do not necessarily have to be very accurate but should be specific to the tissue and must contain only the targeted tissue type. If the tissue comes in different appearances, create multiple annotations for this class to train the AI sufficiently. It is best not to combine multiple appearances of a single tissue class in a single annotation. At last, click “Train” to trigger the analysis of your training annotations patch by patch. In this step, which does not take long, since it does not actually involve re-training, the AI will learn a mathematical representation of each tissue type (i.e., one or multiple “prototypes” per class that represent the class in the feature space aka embedding).
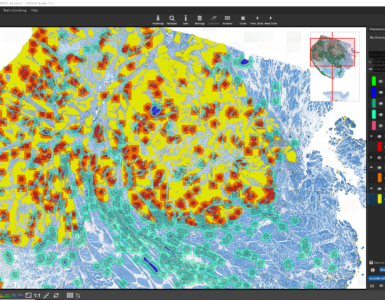
To test the performance of the new AI define a ROI manually that contains all tissue types but was not annotated before.
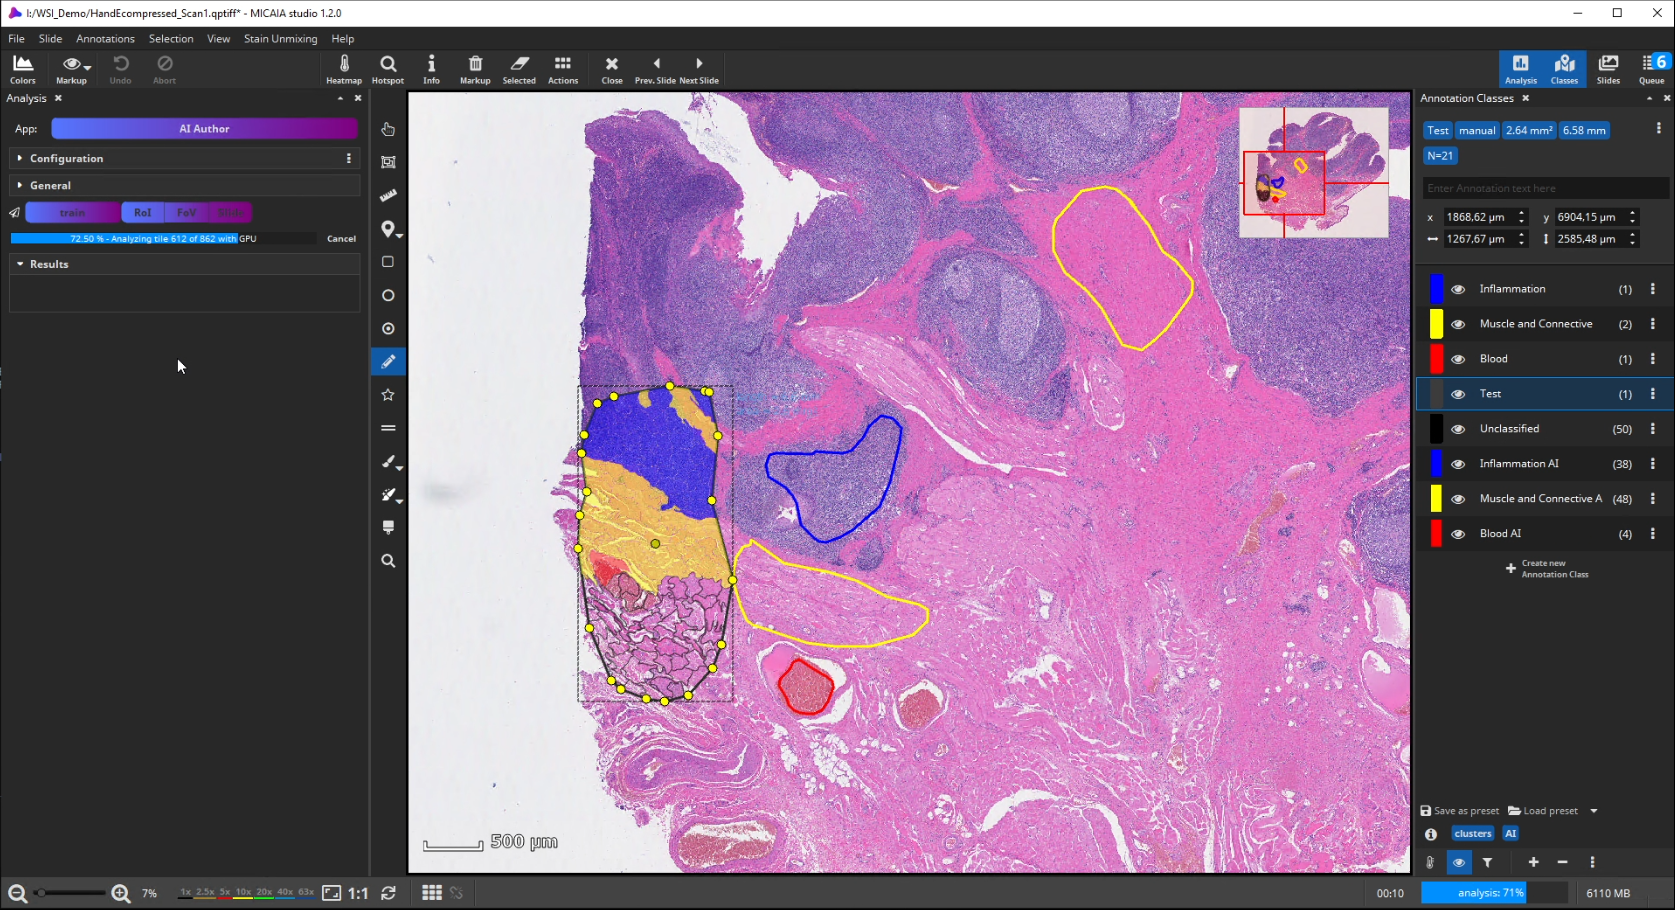
After the ROI is analyzed patch by patch, evaluate the quality of the result. Since we trained the AI to cope with color differences induced by the use of different scanners, staining protocols or tissue thickness, it pays more attention to tissue texture than to tissue color. In the below example, a misclassification occurs: a region is classified as the red class (blood), but should be assigned to the yellow class (muscle and connective tissue).
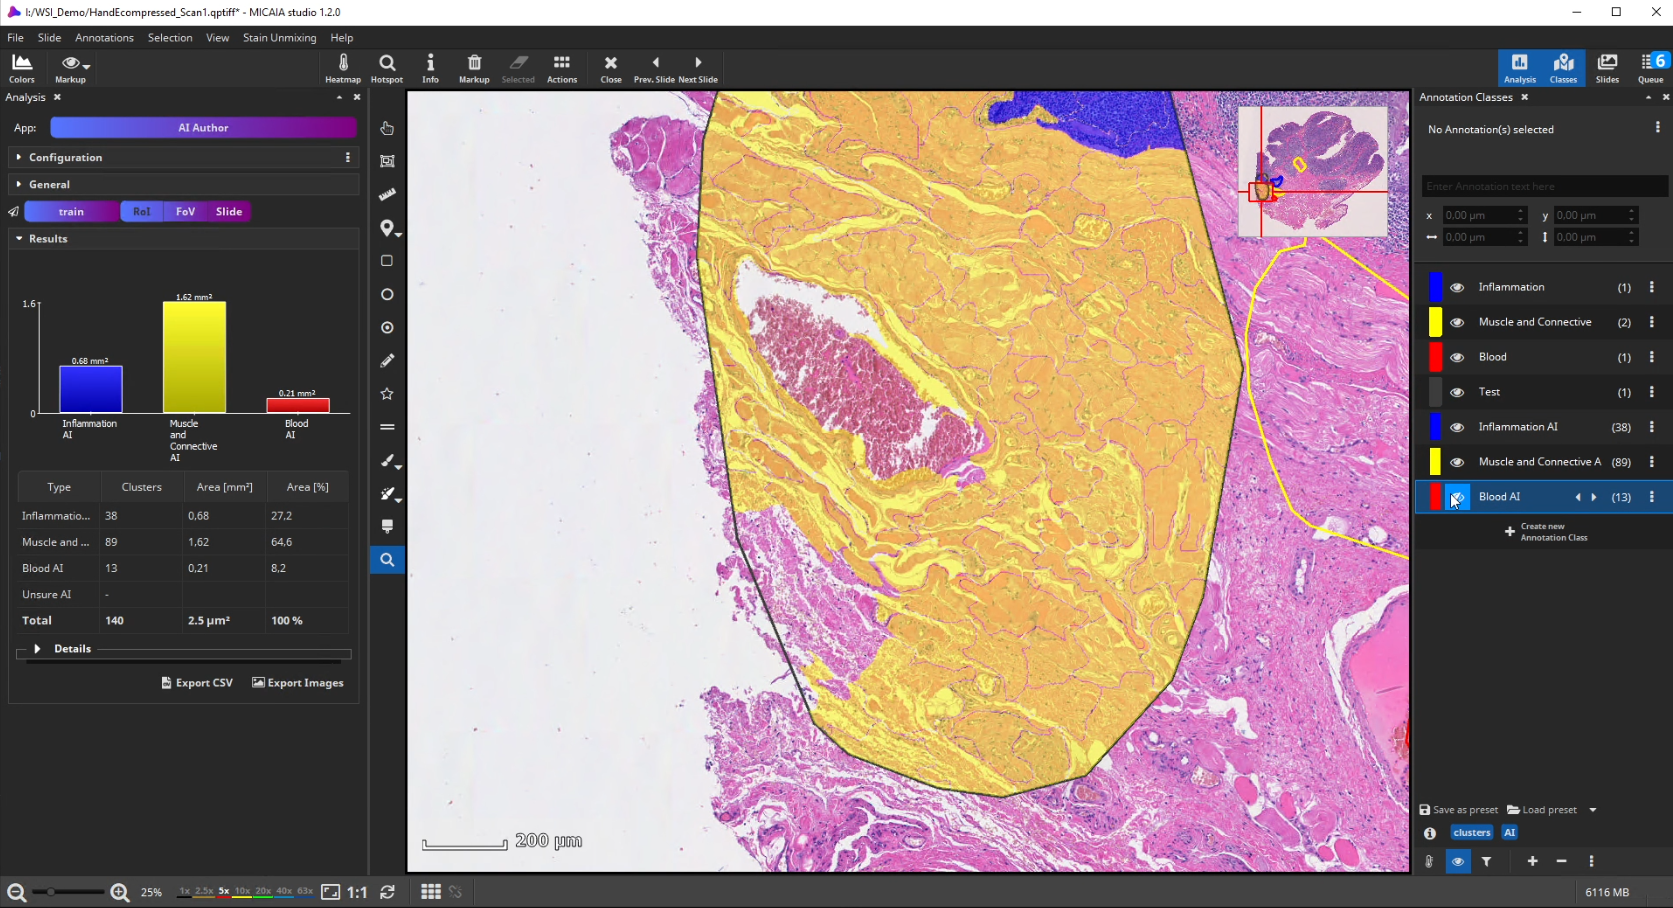
This is understandable, since the misclassified region has a similar texture to the blood class and none of the yellow class’es training annotations contained a similarly looking region. Also, the AI backbone was trained to pay more attention to texture than to color in order to better cope with real-world data heterogeity caused by (1) unstandardized staining protocols, (2) varying tissue thickness and (3) different scanners with different optics, camera and color postprocessing.
If the analysis result contains mistakes (mispredictions), do not worry. Simply add an additional “corrective” training annotation in order to teach the AI that the tissue in the misclassified area actually belongs to the yellow class.
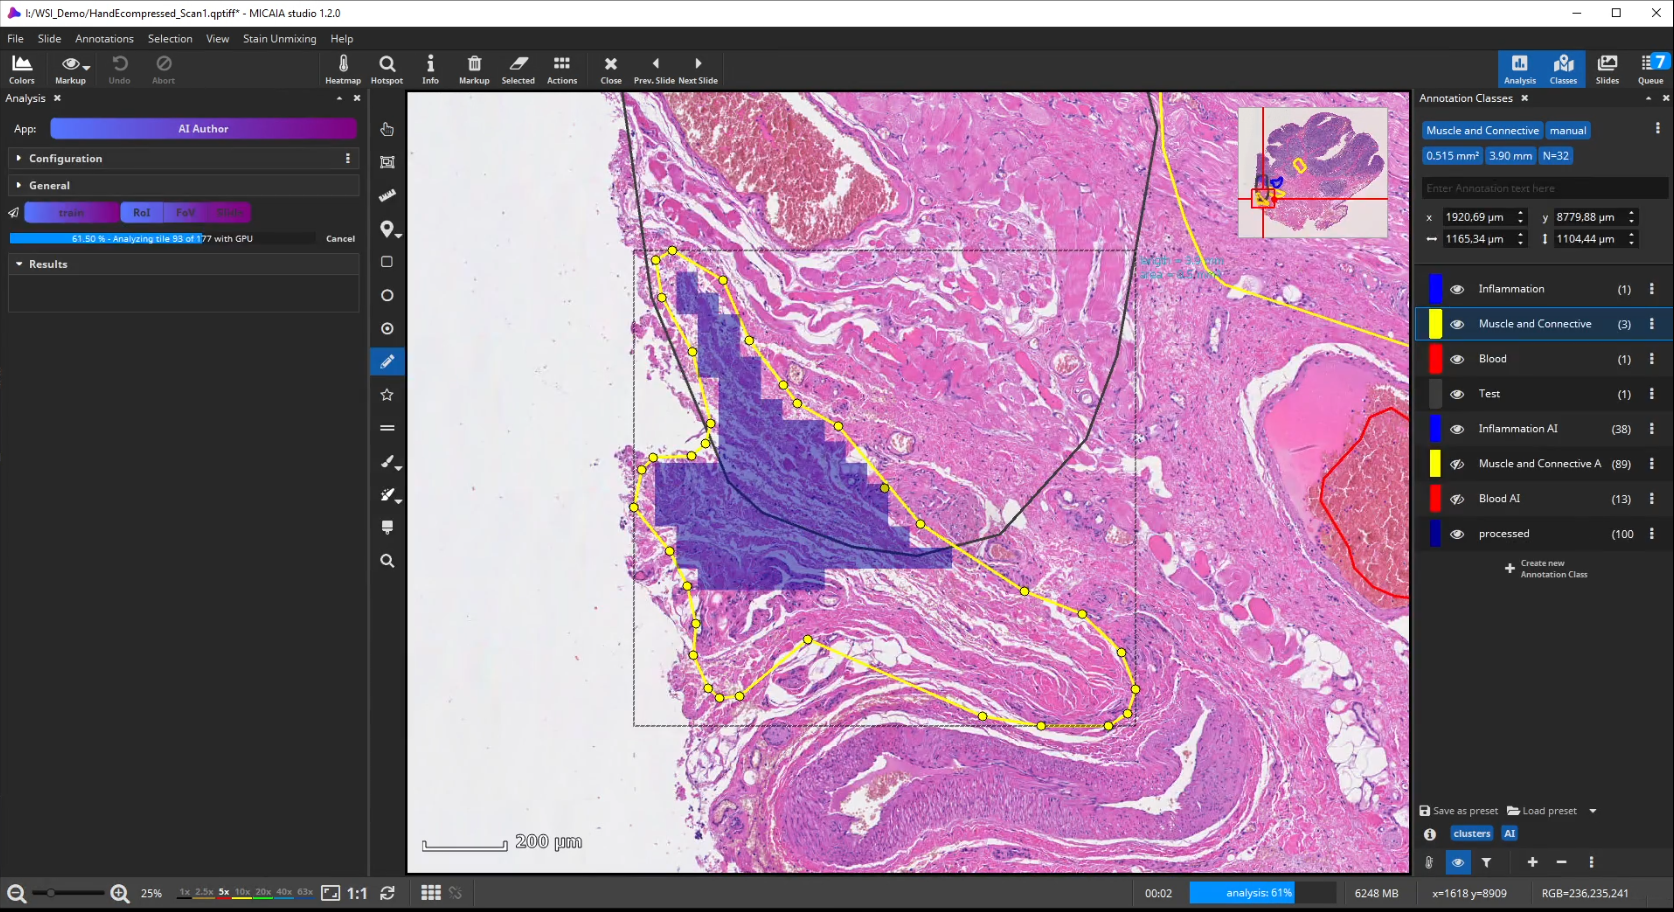
Afterwards evaluate the performance again. This way, you can iteratively add new training annotations.
In fact, the AI Author App can be regarded as a guided annotation tool (similar to Active Learning), since a user can spot misclassifications early on and then add annotations where they are necessary and help the model (as opposed to wasting time on adding many annotations at places that do not really help the AI)
Add your AI to the App Center
When you are happy with the result, the trained AI is ready to be used.
After selecting an icon and adding a suitable description text, toggle the “Show in App Center” switch to show your custom AI as a new app in the MIKAIA App Center. You can even export your AI model and share it with other MIKAIA users.
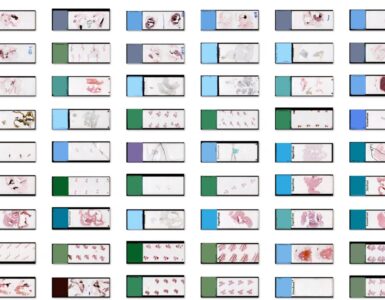
Batch Analysis
Like with most other apps, the AI Author App supports analyzing single ROIs or slides as well as entire datasets. Simply import the folder (or folders) containing your dataset into the “Slides” pane. Then multi-select some or all slides. The analyze “Slide” button will then turn into the analyze “Batch” button. Click it to submit an analysis job for each selected slide into the job queue. Now lean back and watch while MIKAIA loads and analyzes one slide after the other.


Add comment